Saturday, March 30, 2013

A Good Egg

This long weekend is turning out very good indeed!  Thank you everyone with all your kind comments on my last post.  They have all helped me put things in perspective, and have dragged me out of a bit of sadness and I'm enjoying my day fully today!  The sunshine and blue skies also helped, and I even dragged out all the patio chairs from the garden shed and actually SAT OUTSIDE TO KNIT this afternoon!!  All of these were a restorative tonic to me and much needed. 

So with my knitting in my wooden bowl as I sat in my chaise, the dog lolling alongside with his head on my lap drifting off to sleep, and Smudge the bunny wheeled out in his cage with ears at the ready, but also drifting off to sleep in the sun, I was able to knit a pretty Good Egg! 


I even worked out a pattern (she said smugly), and if anyone wants to knit themselves A Good Egg for Easter, there's still time as these are quick to knit up (ok, I'll admit, it took me about an hour to knit one egg, but I'm a very slow knitter ... and there were interruptions from a certain young lady home from university!!).
 
So here we go:
 
A Good Egg ... A Pattern
 
Yarn Used:  Bernat Cotton (4 ply)
 
Needles:  3 mm DPNs (set of 4)
 
CO 3 sts
 
Holding the 'tail' and the working yarn together, knit each stitch onto a separate DPN, ending up with 2 'loops' on each of 3 DPNs
 
Drop the 'tail'
Round 1:  Kfb of all 'loops'  (12 sts)
Round 2:  K
Round 3:  *Kfb, K1, repeat from * to end  of round (18 sts)
Round 4:  K
Round 5:  *K1, M1, K2, repeat from * to end of round  (24 sts)
Round 6:  K
Round 7:  *K1, M1, K3, repeat from * to end of round  (30 sts)
Round 8:  K
Round 9:  *K1, M1, K4, repeat from * to end of round  (36 sts)
Round 10 - Round 15:  K
Round 16:  *K10, K2tog, repeat from * to end of round  (33 sts)
Round 17:  K
Round 18:  *K9, K2tog, repeat from * to end of round (30 sts)
Round 19:  K
Round 20:  *K8, K2tog, repeat from * to end of round  (27 sts)
Round 21 - Round 23:  K
Round 24:  *K7, K2tog, repeat from * to end of round  (24 sts)
Round 25:  K
STUFF WITH FIBRE FILL AT THIS POINT!
Round 26:  *K6, K2tog, repeat from * to end of round  (21 sts)
Round 27:  *K5, K2tog, repeat from * to end of round  (18 sts)
Round 28:  *K4, K2tog, repeat from * to end of round  (15 sts)
Round 29:  *K3, K2tog, repeat from * to end of round  (12 sts)
Round 30:  *K2, K2tog, repeat from * to end of round  (9 sts)
Round 31:  *K1, K2tog, repeat from * to end of round  (6 sts)

Break thread and pull through last 6 sts and tie off.

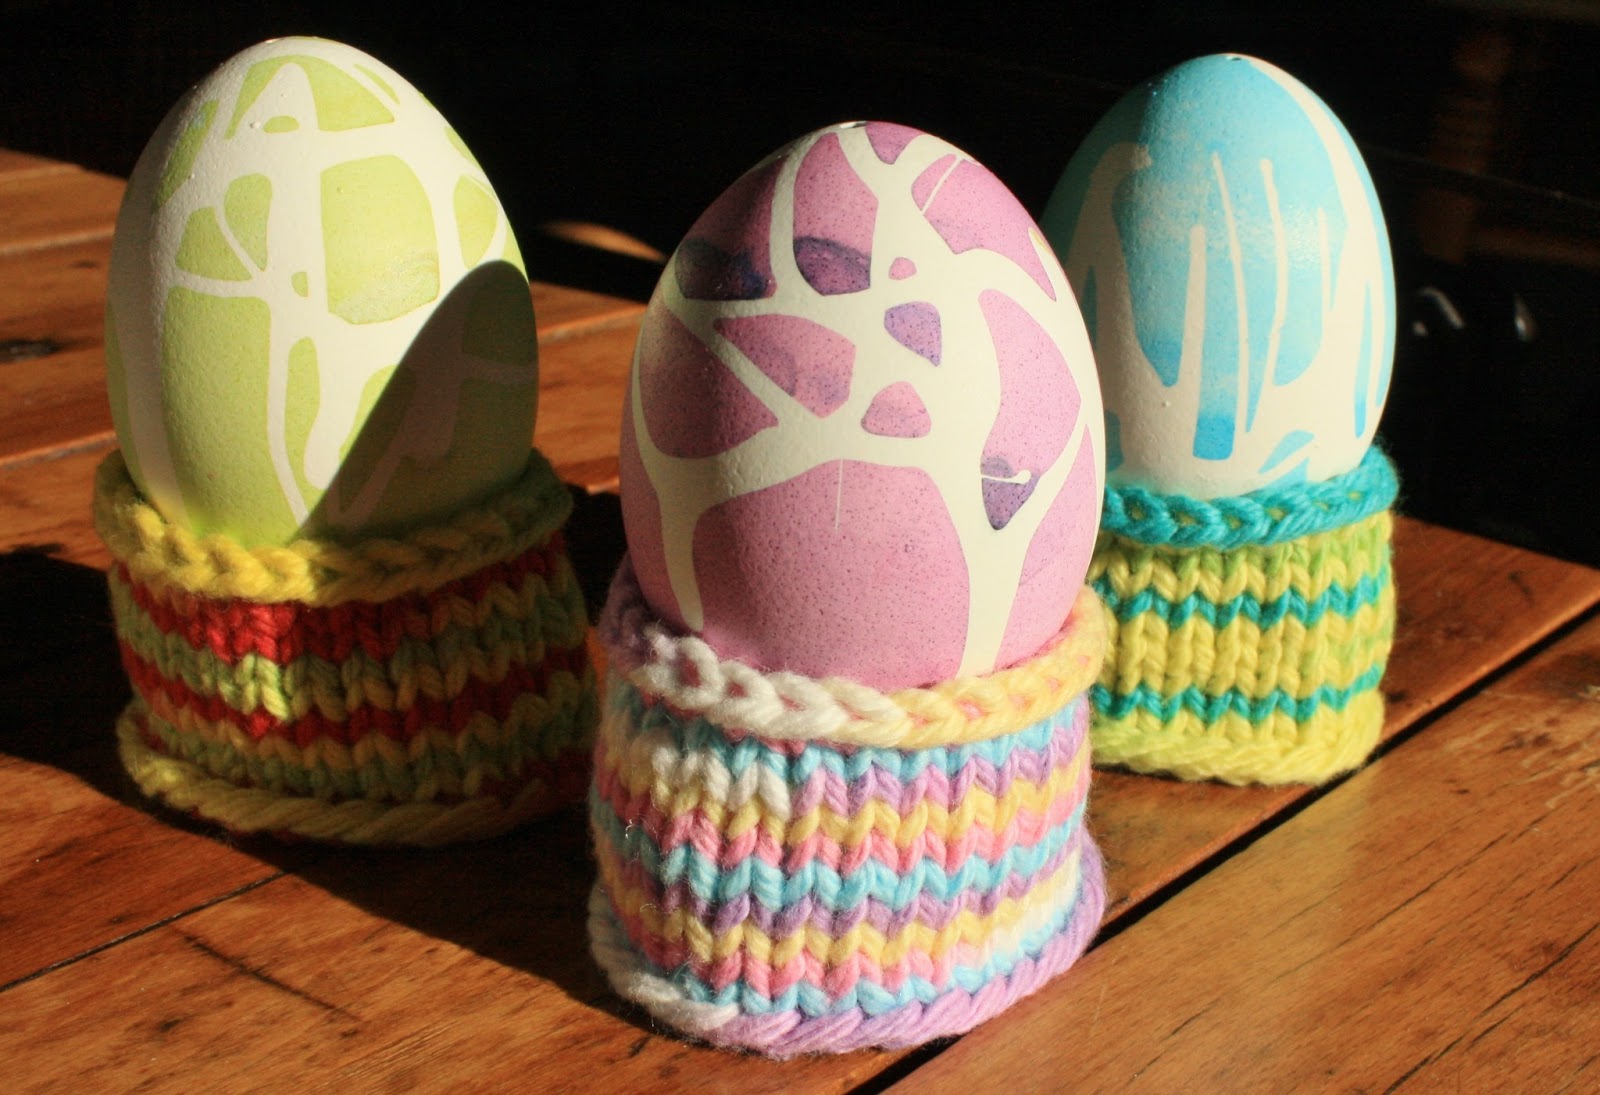
Hopefully you'll end up with something like this ...

 
You can obviously change colours wherever you wish. 
 
Happy Easter Everyone and thanks for stopping by!
 
Wendy

Wednesday, March 27, 2013

Knitted Easter Eggs


No sooner did I post about my Easter Egg Holders than I started thinking about the actual eggs, and how I could knit those too.


I could've first checked on Ravelry, of course, but I wanted to try figuring them out myself first.  My first attempt was a bit sloppy.  Especially where I carried the lime green yarn up by twisting it ...
 
 
The next attempt ended up larger (wasn't paying attention to the number of increases), and it turned out rather pear shaped ...
 
 
But the knitting was better, and I kind of like the swirl up the sides from the increases and decreases ...
 
 
(honestly, it's the little things that make me happy in knitting) ...
 
 
My last attempt (but not my final attempt yet!) turned out the best shape, but I didn't really like the colours ...
 
 
And then I gave up and checked out Ravelry.  So many free patterns to choose from!  Some with decorative designs in the middle, some knit flat, some knit in the round, and some knit from the middle up and then from the middle down ... I tell ya, the choice was almost too much!  One thing I might try though is to wrap the egg around a plastic egg to give it better shape.  Mine are sort of lumpy with the fibre fill stuffing. 
 
 
But I think I have a free evening tonight, and I figured  why not print out a pattern and have a go.
I think I may have this sorted out by next Easter ;)
 
Thanks for stopping by!
 
Wendy

Saturday, March 23, 2013

Easter Egg Holders


Well, my brother and his boys have flown home this afternoon ...

 
I hate that abandoned, empty feeling a house has after your guests have gone.  We dropped them off at the airport leaving them on the loading zone because my family all knows I hate long drawn-out goodbyes ... so we don't go into the airport with them anymore.  It's drop, hop back into the truck, and zoom off to more furious waving ... quick like a bandaid! ... but no less painful.
 
I'll miss all the boys' little paper monster creations that have been scattered around the house for the past two weeks ...
 
 
So when we returned home, I thought I'd console myself with a little blogging since I've not been able to do much of it while they were all here. 

 
Over the years, my kids decorated a lot of Easter eggs.  I used to just set them out in a special bowl at Easter time to show them off, but I got tired of that (and I also got tired of the huge number of eggs we had saved!). 
 
This egg decorating:  Drizzle rubber cement glue on the egg; allow it to dry; dip egg in dye; allow dye to dry; peel off rubber cement glue
 
So last year I created a simple little egg holder from cotton yarn to hold the eggs ... and I got rid of quite a few eggs at the same time.  The brown eggs below were dyed with onion skins wrapped around them and boiled in water.
 
 
I always poke holes in the eggs we're going to decorate and blow out the liquid egg.  And I always get a severe headache from it.  I've never seen one of the handy egg 'pumps'(?) that removes the liquid egg without giving yourself a brain aneurism at the same time, but if I do I will buy it.  Until then, I always have the Advil handy ;)
 
 
Anyway, back to the egg holders.  If you're interested in making your own, these are the instructions:
 
Knitted Egg Holders
 
Using 4 ply cotton yarn and a set of four 3mm DPNs,
cast on 28 stitches,
divide on three needles as 9, 9 and 10 stitches,
knit 10 rows,
bind off loosely.
 
easy peasy
 
The cotton  and the fact that these are small keeps the holders rather stiff, so there's no need for stuffing inside.
 
 
They don't take much yarn either, and you can whip off a few in a short amount of time.  It's the egg decorating that's so time consuming!
 
 
I hope you're all having a great weekend ... our sunshine has returned and I can see some iris just poking through the ground from my kitchen window ... not long now before SPRING truly arrives (fingers crossed!!).


Thanks for stopping by!
 
Wendy


Tuesday, March 19, 2013

Swirl Hat

I finally made a hat for myself.


I've only made a couple of hats previously and I found them challenging working with dpns.  But I've got a bit more experience under my belt now, and found this hat pattern to be quick and easy!  I followed this pattern from Ravelry.  Using DK yarn and 3.25mm needles.  I worked it in circular needles to start and then changed to dpns for decreasing.


I'm very happy with the result, and like that swirl pattern.  And my husband kindly agreed with me that it doesn't look dorky, but that my other hat does.  hmmm  The only thing I've found in wearing it is that it doesn't keep my head as warm as my 'dorky' hat, so it is only good for these mild winter days (not for
-20C).


And I found another good use for my glass dome ... it's modeling the hat :)
 
Thanks for stopping by!
 
Wendy
 
 
Linking up with Linda & Ana and ...


Tuesday, March 12, 2013

Tea Party Tuesday

 
Who didn't love a tea party as a child?
 

These photos are of my cousins at my grandmother's house in the 1950s.  Since the photos were taken at my grandmother's house, I imagine the tea service was originally my mother's (she was the only girl, and my grandmother doted on her).  Having a tea service like this one during the Great Depression must've been a very special treat for my mother. 
 
My grandfather was a market farmer, and sold apples, potatoes, asparagus and such from his small ten-acre farm in Hamilton.  He had a stall at the Hamilton Market.  Money was tight, and they survived on credit during the winters. 
 
My grandmother had a circle of friends that would invite each other over for tea on a rotating basis.  One time when it was my grandmother's turn, she had no money to put together a proper tea.  So she took some jewelry down to the pawn shop to sell.  It must've been a heart-breaking moment for her.  She didn't want to lose face in front of her friends.  I hope they enjoyed that spread!!
 
 
That black glossy blob in the forefront is my mom's dog, Muffie, a cocker spaniel.  The last dog my grandmother owned.  Don't you love the way she sits and watches every mouthful the kids are eating? 

The two wicker pieces came to my mother after Grandma passed away.  The chair got lots of use by my sisters, brother and I when we were kids.

 
I'd like to say that the little china tea service survived for many years, but I only remember seeing a couple of the tea cups in our house after Grandma passed away.  They were reverently packed away in the china cabinet where we weren't allowed to touch them!   The tea cups had paintings in a Japanese style on the sides, and a dark golden band.  The finish was a slight mother of pearl which made them look very antique and special in my eyes. 
 
Hope you're enjoying your Tea Party Tuesday!!
 
Linking up with Chantille-Fleur and ...


Thanks for stopping by!
 
Wendy

Thursday, March 07, 2013

It's Maple Sugar Time!

Tomorrow is the start of March Break here in Ontario.  High school and primary schools are off for all of next week.  Traditionally, this is also the big week for maple sugar bushes to start operation, as they can be guaranteed a big turnout with a lot of people taking the week off with their kids. 


 Some of the sugar bushes are mediocre at best, but the really good sugar bushes have the trees tapped where you can see them, some traditional displays of how sap was boiled down by pioneers and native North Americans, a horse drawn wagon ride, the inevitable pancake house where you can enjoy some freshly cooked pancakes with some locally prepared maple syrup ... and the sugar shack where you can buy your own tin or bottle of syrup and a maple-shaped candy or two.


This is an old picture of my brother and I with our goats 'Jenny' and 'Tinker', a mother & daughter.  Behind us are the woods where my family would collect and boil down our own maple sap into delicious maple syrup for about two weeks.  The entire portion of our sugar maple woods were on a hillside.  We only tapped about 20 trees, but those trees were good producers and there was always enough syrup to get us through most of the year. 

 
We all loved helping with the sap, as it was an opportunity to spend long days in the woods ... the snow crystalline by this time of year, and it was finally just warm enough to hang your winter jacket on a tree branch and sit by the fire in your sweater ... the sun warming the ground and the trees all around you ... the chickadees singing their spring song "spring's here!  spring's here".  We had tamed the chickadees (and an occasional nuthatch and woodpecker) to come to our hands for sunflower seeds.  So they were always flitting around us through the woods begging for some seeds and making us laugh with their funny adorable ways.  We were a family that always had sunflower seeds in our pockets!
 
This is the bottom of our wooded hill where the creek has flooded the flats in springtime.
 
 
Once the sap started running, the trees were tapped with little spiles (spouts) and the buckets hung from the spiles.  Ahhh, the sound of the steady plink, plink, plink as the sap started to fill the bucket!!  SPRING TIME!!  It was our job as kids to regularly walk the path and collect the sap from each tree, and lug the heavy pails back to the fire.  It got tricky along the path because we were walking on a hill, and the snow was packed down on the narrow trail and slippery ... there were more than a few buckets spilled into the ground through the 37 years of living there. 
 
We had a fire burning non-stop during the day in an oil drum set on its side.  My dad fixed an old woodstove door to the opening and cut a rectangle in the top to hold a large steel tub where we poured the sap and it slowly boiled and thickened over the fire (40 gallons of sap = 1 gallon of syrup) . 
 
The best part was testing the sap to see if it was thick enough.  We didn't have the fancy gadgets you can buy for checking sugar content, we just tested it by dipping a spoon in, taking a sip and  agreement all round "yep! it's ready!"  My dad was always just a bit stingy here and wouldn't boil it down to really nice thick syrup, and it was always just a bit runny, but it still tasted great.  Nothing like the taste of maple syrup that's been boiled down over a wood fire.  There was always a little bit of woody bits settled in the bottom of each jar!  Mom would bottle the maple syrup in the kitchen with sterilized jars, and it was with a sense of satisfaction that we'd admire the rows of dark golden syrup lining the counter. 
 
After my two sisters, brother and I left home, we still managed to meet up again during the March break to help with the sap boiling with all our kids in tow.  The cousins all learned to love this special time too. 
 
The country property was sold a few years ago, and I'm not sure if the new owners followed our tradition.  My parents were always saying "Oh, I don't think we'll boil the sap down this year, it's getting too much for us".  But they must have sensed everyone's disappointment, for they continued on a smaller scale until the year before they left (Mom was 82, Dad was 86).  It's one of the many things that will always remain close to my heart about living in the country and spending time with family.  Whenever we have a spring day with crystalized snow and I can smell woodsmoke from a neighbour's woodstove, I just close my eyes and I'm back in a flash to the woods that I love with the sap boiling in the pot!
 
Pancakes and syrup anyone?
 
 
Thanks for stopping by!
 
Wendy


Wednesday, March 06, 2013

Winner of Pass-Along & Give-Away

 
I have drawn a name for the book pass-along and the doll give-away.  And the winner is ...


Congratulations Nicole ... I've made this little doll just for you :) I made her all spring-like to hopefully nudge winter along on its way.  If you could just contact me with your mailing address, I'll send this along to you straight away.
 
Thanks to everyone who participated in my first blog give-away thingy ... I think I'll do this again sometime.
 
And welcome to a few new followers, I hope you enjoy reading my blog.
 
Thanks for stopping by :)
 
Wendy
 

Friday, March 01, 2013

A Pass-Along & Give-Away


I recently received this book, "The Fine Colour of Rust" from the lovely Claire at Thriftwood.  This book has been passed along a few times between various bloggers, and now it has come to me.  Thank you Claire for choosing my name!  I've now finished reading the book, and quite enjoyed it ... it's rather funny with some poignant moments as well, but a light read.  Here's the back to give you a better idea ...

 
So it's now my turn to pass the book along to someone who is interested.  This offer is open to anyone who is a follower of my blog.  If I choose your name from "the hat", I'll ship it off to you and you just have to sign your name to the enclosed card, read the book, and send it off again.  The book has already been back and forth across the ocean between England, USA and now Canada :) 
 
As a bonus, I'll also be enclosing with the book a small Springtime 'wee folk'  doll made from a Salley Mavor pattern. 
 
 
The dolls are wire forms with an embroidered felt tunic, silk flower petal dress and an acorn cap for a tam.  It won't be the exact doll shown, but something very similar (it's still in the works), but I wanted to get this post up before the weekend.
 
So just leave a comment that you want your name added to the draw, and I'll pull out a name on Wednesday, March 6.
 
Good Luck and I hope you all have a great weekend!!
 
Wendy
 
----------------------------------------------------------------------------
 
PS  Saw this little poem today, which suits my yesterday's post:
 
Snow, snow faster,
The cow's in the pasture.
 
Snow, snow give over,
The cow's in the clover.
 
 
Toodles!!
Related Posts Plugin for WordPress, Blogger...